UI: Forms and Layout
Core Principle: Forms, Controls, and Encapsulation
Section titled “Core Principle: Forms, Controls, and Encapsulation”Before touching the editor, it is worth understanding the two primitives the UI framework is built from — because they shape every decision made in this chapter.
A control is a specialised UI element: a button, a knob, a level meter, a text label. Controls are the leaves of the tree.
A form is a container that holds controls — and, crucially, a Lua script
that handles dynamic interactions. Every form is
[control container + Lua script]. Forms can contain other forms, which is what
makes complex UIs manageable.
The guiding principle is encapsulation. Each form should be self-contained and know only what it needs to know about itself. A step button knows its own index and whether it is selected. It does not know how many other steps exist or what the global sequencer state is. The form above it passes in what it needs via macro parameters and listens for events. This keeps each piece small, testable, and reusable.
If you are coming from Kontakt, this is a significant shift. Kontakt scripting is essentially one global blob that has to manage every interaction in the instrument at once. Here, complex behaviour is decomposed into small forms that each handle their own concerns — the complexity stays local and proportional.
This will become concrete in a moment. The first form we build is the step button, and we will build it exactly once — then the containing form instantiates it 16 times.
Create the Step Button Form
Section titled “Create the Step Button Form”Right-click patches -> main -> ui in the file tree and choose Create new UI
form. Name it step_button.
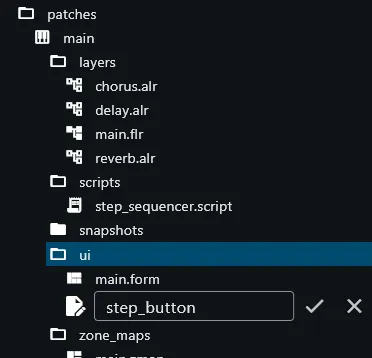
A new minimal form opens — the editor’s “hello world” starting point.
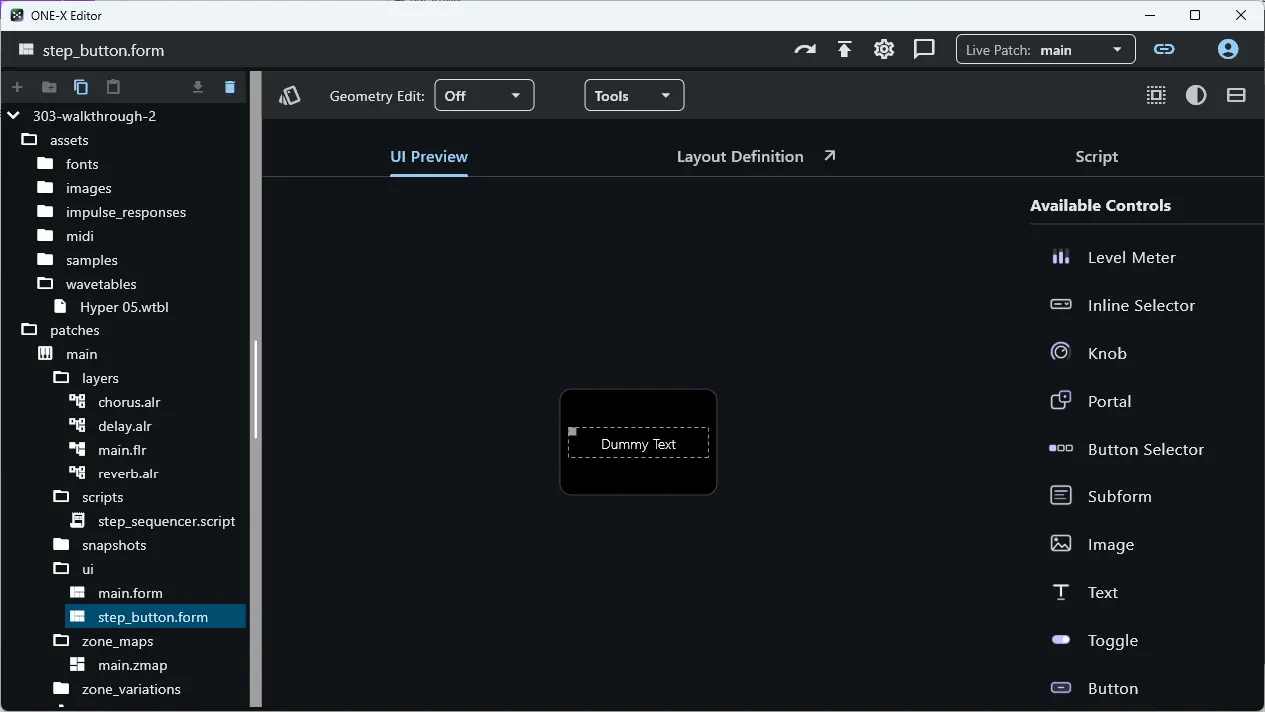
Detach the YAML Editor
Section titled “Detach the YAML Editor”This chapter involves editing YAML frequently and seeing the result in real time. Detach the YAML editor to open it in its own window alongside the form preview.

Remember: changes to YAML or Lua scripts only take effect after pressing Apply. Get into the habit of pressing it after every edit — it is easy to forget and wonder why nothing changed.
Define the Step Button Layout
Section titled “Define the Step Button Layout”Replace the default YAML with the following:
width: 40height: 72
controls:  base:    anchors: { left: 0, right: 0, bottom: 0, height: 57 }    type: button    props:      phaseBitmap: "step_button.png"      text: ""      onPressed: on_select      tintColor: "$stepColor"
  led:    anchors: { hCenter: 0, top: 12, width: 30, height: 30 }    type: levelMeter    props:      orientation: vertical      value: 0.0      phaseBitmap: "led_p3_c2.png"
  caption:    anchors: { left: 0, top: -3, right: 0, height: 16 }    type: text    props:      text: "$stepIdx"      fontScale: 0.8      fontWeight: 700
Three controls make up each step button:
base— the button graphic, drawn from thestep_button.pngbitmap.onPressedwires it to a Lua handler calledon_select(defined in this form’s script).tintColoraccepts the$stepColormacro, which the containing form uses to distinguish quarter-note steps from the rest.led— a level meter driven by theled_p3_c2.pngfilmstrip, used here as an indicator that shows the steps current state: off, selected or playing.caption— a text label showing the step number, taken from the$stepIdxmacro parameter.
Both $stepIdx and $stepColor are macro parameters — values the
containing form passes in when it instantiates this sub-form. The step button
itself does not know which step it represents; the parent tells it via
$stepIdx. This is encapsulation in practice: the form’s layout and behaviour
are defined once; the parent supplies the varying data.
Preview the Step Button
Section titled “Preview the Step Button”After pressing Apply, the editor renders a live preview of the form. The step
button appears, but it will look slightly off — the $stepIdx caption and
$stepColor tint are unresolved because no parent form is passing them in yet.
This is perfectly normal at this stage. Macros are resolved at runtime by the
containing form; in isolation the editor shows them as empty or default.
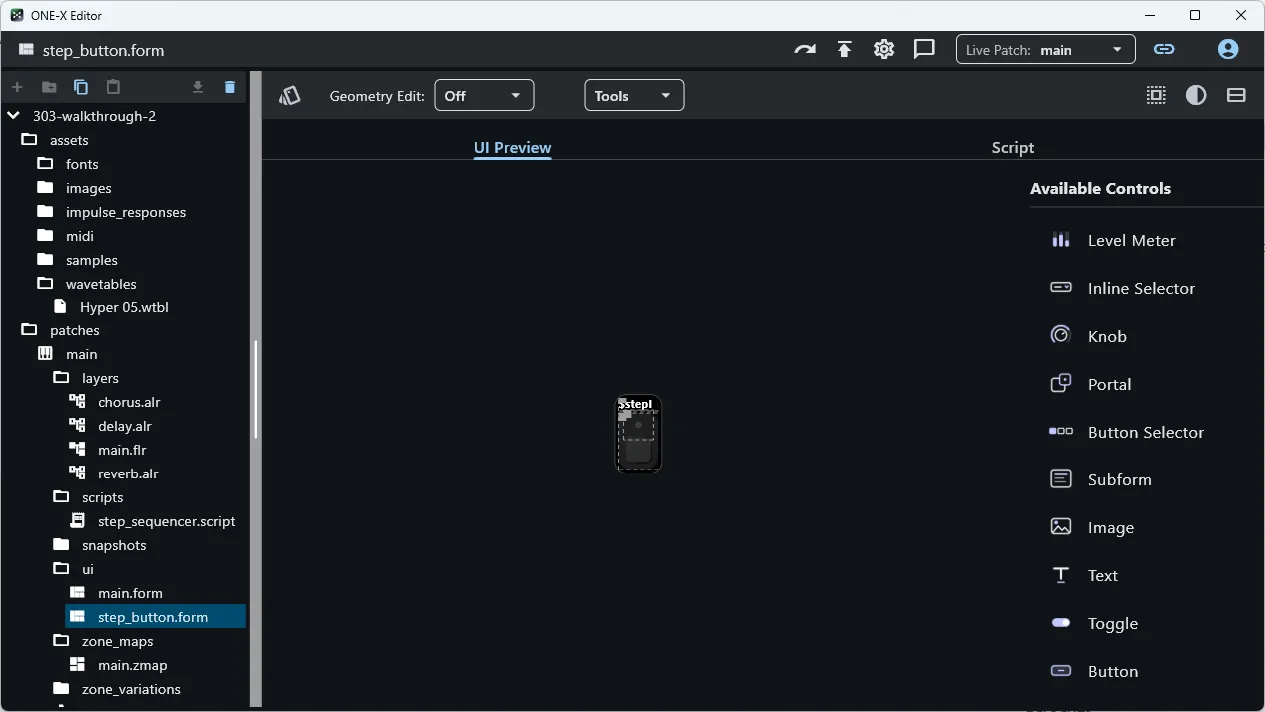
Navigating the Form Preview
Section titled “Navigating the Form Preview”With a form on screen this is a good moment to get familiar with a few editor features that will save time throughout this chapter.
Zoom and pan. The preview can be zoomed with the mouse wheel and panned by clicking and dragging. Use this freely — complex forms get busy and being able to zoom into a specific control is useful.
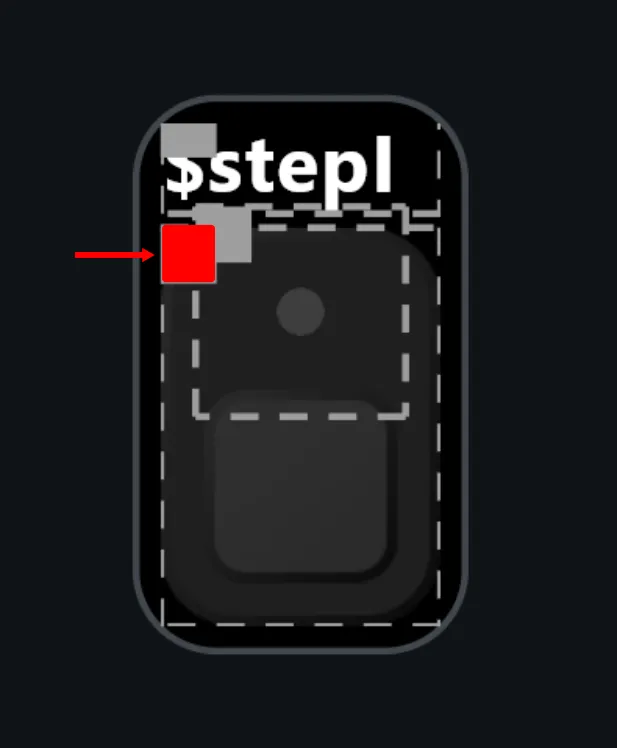
Control annotations. By default every control in the preview has a dashed border drawn around it and a small square handle at its top-left corner. These are editor overlays — they are not part of the rendered UI. They can be toggled on and off with a tool button in the upper-right area of the preview panel.
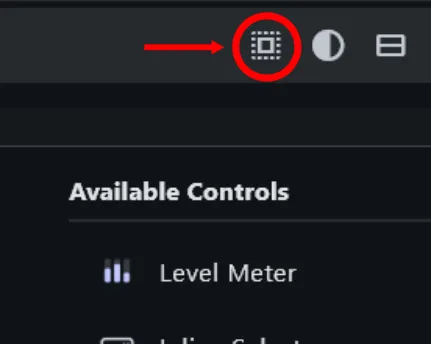
YAML navigation. Clicking the small square handle at the top-left of any control selects that control’s YAML block in the YAML editor. On a form with many controls this is the fastest way to jump to the definition you want to edit without scrolling through the whole file.
The Step Button Lua Script
Section titled “The Step Button Lua Script”The YAML defines the layout. The form’s Lua script defines the behaviour — specifically, how the LED responds to the playhead and the selection state, and what happens when the button is pressed.
Open the script editor for this form and enter the following:
-- keep copies of the currently selected / playing step:local stepPlayinglocal stepSelected
-- $stepIdx is the macro parameter used by the parent form to identify this step button:local ownStepIdxStr = sys_form_macros["$stepIdx"]
-- always make sure the macro parameter is valid:local ownStepIdx = ownStepIdxStr ~= nil and tonumber(ownStepIdxStr) or 0
-- if anything changes, re-evaluate the LED state:function setLEDState()  if ownStepIdx == stepPlaying then    -- we're being the currently played step (playhead)? => LED red (0.5: middle phase of the bitmap)    sys_modify_control("led", "props", { value = 0.5 })  elseif ownStepIdx == stepSelected then    -- we're being selected? => LED green (1.0: last phase of the bitmap)    sys_modify_control("led", "props", { value = 1.0 })  else    -- we're being none of the above? => LED off    sys_modify_control("led", "props", { value = 0.0 })  endend
-- called when the playing step changes:function stepPlayingChanged(step)  stepPlaying = step  setLEDState()end
-- called when the selected step changes:function stepSelectedChanged(step)  stepSelected = step  setLEDState()end
-- subscribe to the global parameters; their changes drive the whole UI:stepPlayingChanged(sys_subscribe_to_parameter("stepPlaying", stepPlayingChanged))stepSelectedChanged(sys_subscribe_to_parameter("stepSelected", stepSelectedChanged))
-- called when this step button is pressed:function on_select()  sys_set_parameter_value("stepSelected", ownStepIdx)
  -- we are not informed by the parameter subscription, since we are the sender!  -- So we need to update the LED state explicitly:  stepSelected = ownStepIdx  setLEDState()end
How the Script Works
Section titled “How the Script Works”Reading the macro parameter. The script reads its own identity from
sys_form_macros["$stepIdx"] — the table the UI framework populates with this
instance’s resolved macros. The value comes in as a string, so tonumber
converts it before use. If no parent has set it yet (e.g. during isolated
editing), the fallback is 0.
The LED state machine. setLEDState is a single function that decides the
LED’s appearance from two independent facts: which step is playing
(stepPlaying) and which step is selected (stepSelected). Keeping all three
outcomes in one place means adding a new state later only requires touching this
one function.
The led control’s value prop drives the filmstrip position: 0.0 = off,
0.5 = red (playhead), 1.0 = green (selected).
Subscriptions. The two sys_subscribe_to_parameter calls at the bottom
register callbacks for stepPlaying and stepSelected. Because
sys_subscribe_to_parameter returns the parameter’s current value at the time
of subscription, feeding that return value straight into the same handler
applies the initial state and registers for future changes in one line — no
separate initialisation step needed.
Pressing the button. on_select writes this step’s index to the
stepSelected global parameter, which notifies every other step button so
they can update their LEDs. But — following the same no-self-notification rule
as the keyboard form — this button will not receive its own stepSelected
callback. So on_select also updates the local stepSelected variable and
calls setLEDState() directly, ensuring this button’s LED turns green
immediately without waiting for a callback that will never come.
The Step Grid Form
Section titled “The Step Grid Form”Create another new UI form the same way as before. Name it step_grid. This
form holds all 16 step buttons — but unlike step_button, almost nothing lives
in the YAML. The controls are created entirely at runtime by the Lua script.
Enter the following as the form’s YAML:
width: 640height: 72controls: {}The only thing the YAML declares is the form’s dimensions. The empty controls
map is a valid starting point — the script will populate it.
The Step Grid Script
Section titled “The Step Grid Script”Open the script editor for this form and enter the following:
-- we'll be creating a bunch of near-identical controls here;-- this is the principal YAML code for one of them, with the-- dynamic modifications embedded as %d / %s placeholders, which-- will be resolved by Lua string interpolation below:local yamlTemplate = [[pos: {x: %d, y: 0, w: 40, h: 72}type: subFormprops:  form: step_button  macroParameters: { "$stepIdx": "%d", "$stepColor": "%s" }]]
local xPos = 0for i = 1, 16 do
  local isQuarterNote = (i - 1) % 4 == 0  local tintColor = isQuarterNote and "#aaa" or ""
  local controlName = string.format("step_%d", i)
  -- string interpolation parameters (matching the template above):  -- * the x position of this step  -- * the $stepIdx macro — tells the sub-form which step it is  -- * the $stepColor macro — lighter tint on quarter-note beats  local controlYAML = string.format(yamlTemplate, xPos, i, tintColor)
  sys_create_control(controlName, controlYAML)
  xPos = xPos + 40end
How the Script Works
Section titled “How the Script Works”YAML as a template. Rather than writing out 16 nearly-identical subForm
entries in YAML, the script defines one template string with %d and %s
format specifiers and uses string.format to fill them in per iteration. The
result of each interpolation is a complete, valid YAML control definition — the
same thing you would write by hand, just generated.
sys_create_control. This UI Lua function takes a control name and a YAML
string and adds the described control to the form at runtime. It is the dynamic
counterpart to declaring a control in the YAML directly. Anything created this
way behaves identically to a statically declared control.
Quarter-note accents. (i - 1) % 4 == 0 is true for steps 1, 5, 9, and 13 —
the downbeats of each bar. Those steps receive a $stepColor of "#aaa", which
the step button applies as a tint over its bitmap. The remaining steps pass an
empty string, leaving the button at its default appearance. The visual
distinction makes the grid readable at a glance.
The result. When the form loads, the loop runs once and all 16 step buttons
appear side by side. Each one is a fully independent step_button sub-form
instance — subscribed to stepPlaying and stepSelected, responding to
presses, managing its own LED — without this grid form knowing anything about
their internals.
At this point the step grid is already fully functional. Add it to a parent form or open it in isolation: pressing any key triggers the sequencer, the red playhead LED advances through the steps in time, and clicking a step lights it green as selected.

The Keyboard Form
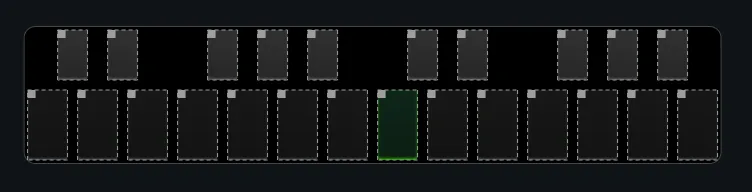
Section titled “The Keyboard Form”Create another new UI form. Name it keyboard. This one renders a
two-octave keyboard that shows which note the selected step is assigned to, and
lets the user change it by clicking a key.
The YAML is once again almost empty — all the keys are created by the script:
width: 690height: 130controls: {}The Keyboard Script
Section titled “The Keyboard Script”The script is split into two logical sections. Enter both together in the form’s script editor (as always, remove the original editor content, then paste BOTH snippets into the editor one after another).
Section 1 — State management and interaction:
-- manage and update the keyboard state: keep copies of the current step data-- + selected step and update the keyboard display accordingly:
local stepslocal stepSelected
-- helper function to be called once anything changes (selected step or step data):function updateKeys()
  if (not stepSelected) or (not steps) then    return  end
  local step = steps[stepSelected]
  for i = 24, 47 do    local isKeyActive = step.note == i    sys_modify_control(tostring(i), "props", { value = isKeyActive })  endend
-- helper function to be called once the step data changes:function stepsChanged(value)  steps = value  updateKeys()end
-- helper function to be called once the selected step changes:function stepSelectedChanged(step)  stepSelected = step  updateKeys()end
-- subscribe to the global parameters; their changes drive the whole UI:stepsChanged(sys_subscribe_to_parameter("stepData", stepsChanged))stepSelectedChanged(sys_subscribe_to_parameter("stepSelected", stepSelectedChanged))

-- called whenever the user clicks on a key:function on_change(controlName, value)
  if (not stepSelected) or (not steps) then    return  end
  local step = steps[stepSelected]
  -- the control name IS the MIDI note — it was set up that way deliberately,  -- so we can extract the note with a simple tonumber:  local midiNote = tonumber(controlName)
  -- toggle behaviour: clicking the active key silences the step (note = -1);  -- clicking any other key assigns that note:  if step.note == midiNote then    step.note = -1  else    step.note = midiNote  end
  -- write the modified data back to stepData; every subscriber  -- (the RT script, the rest of the UI) will be notified automatically:  sys_set_parameter_value("stepData", steps)
  -- whenever we change a parameter with set_parameter_value(),  -- we (this form) are NOT notified on that particular change from  -- sys_subscribe_to_parameter (this is standard behaviour to  -- prevent update feedback loops).  -- Therefore, we need to trigger the key state update explicitly here:  updateKeys()
end
Section 2 — Dynamic key creation:
-- YAML template for a black key:local blackKeyTemplate = [[pos: {x: %d, y: %d, w: 30, h: 50}type: toggleprops:  phaseBitmap: "black_key_p2_c2.png"  onChange: on_change]]
-- YAML template for a white key:local whiteKeyTemplate = [[pos: {x: %d, y: %d, w: 40, h: 70}type: toggleprops:  phaseBitmap: "white_key_p2_c2.png"  onChange: on_change]]
-- positional layout of one octave (x/y relative to the octave's left edge):local octaveLayout = {  { x =   0, y = 60, isBlack = false },  -- C  { x =  30, y =  0, isBlack = true  },  -- C#  { x =  50, y = 60, isBlack = false },  -- D  { x =  80, y =  0, isBlack = true  },  -- D#  { x = 100, y = 60, isBlack = false },  -- E  { x = 150, y = 60, isBlack = false },  -- F  { x = 180, y =  0, isBlack = true  },  -- F#  { x = 200, y = 60, isBlack = false },  -- G  { x = 230, y =  0, isBlack = true  },  -- G#  { x = 250, y = 60, isBlack = false },  -- A  { x = 280, y =  0, isBlack = true  },  -- A#  { x = 300, y = 60, isBlack = false },  -- B}
-- creates one octave of keys starting at the given MIDI note and x offset:function createOctave(startKey, startX)  for i, v in ipairs(octaveLayout) do    -- Lua indices are 1-based, so subtract 1 before adding startKey:    local controlName = string.format("%d", i - 1 + startKey)    local controlYaml
    if v.isBlack then      controlYaml = string.format(blackKeyTemplate, v.x + startX, v.y)    else      controlYaml = string.format(whiteKeyTemplate, v.x + startX, v.y)    end
    sys_create_control(controlName, controlYaml)  endend
createOctave(24, 0)    -- C2–B2createOctave(36, 350)  -- C3–B3
How the Script Works
Section titled “How the Script Works”Control names as data. Each key’s control name is set to its MIDI note
number as a string ("24", "25", …). This is a deliberate convention: when
on_change fires, tonumber(controlName) gives the MIDI note directly, with no
lookup table needed.
Visual state vs. data state. The toggle controls are not the source of truth
for which note is active — stepData is. updateKeys reads the selected step’s
note from stepData and sets each key’s value prop accordingly. When the user
clicks a key, on_change modifies stepData and writes it back via
sys_set_parameter_value. Every other subscriber to stepData (the RT
script, other forms) will be notified and can react. The keyboard form itself,
however, will not receive its own callback — see below.
No self-notification. When a form calls sys_set_parameter_value, the
framework deliberately does not fire that parameter’s subscription callback back
to the same form. This is standard behaviour that prevents feedback loops: a
write triggering a callback triggering another write, and so on. As a
consequence, on_change must call updateKeys() explicitly after writing to
stepData — the subscription alone is not enough to refresh the keyboard’s own
display after a local change. Every other subscriber will be notified; only this
form has to update itself manually.
Toggle behaviour. Clicking a key that is already active sets the step’s note
to -1 (silence), matching the convention established in stepData’s default
value. Clicking any other key assigns that note. This gives the keyboard a
natural on/off feel without any separate “clear” button.
The octave layout table. Rather than computing key positions mathematically,
the octaveLayout table records the exact x/y offset and black/white
classification for each of the 12 chromatic pitches. createOctave iterates it
twice — once at x offset 0 for C2–B2, once at 350 for C3–B3 — placing 24
keys in total.
Composing the Main Form
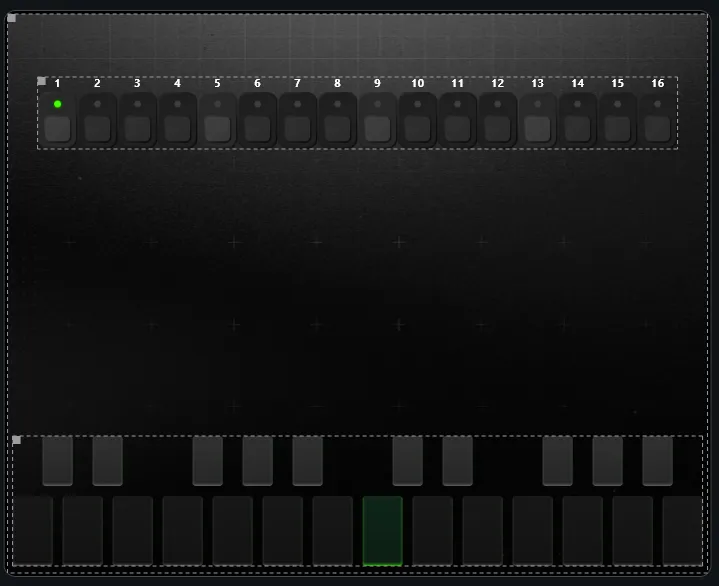
Section titled “Composing the Main Form”The two forms built so far — step_grid and keyboard — are independent and
fully functional on their own. The main form simply places them together on
screen.
Open the main form’s YAML and replace its contents with the following:
width: 700height: 560controls:  bg_image:    anchors: { left: 0, top: 0, right: 0, bottom: 0 }    type: image    props:      image: plugin_bg.png
  steps:    pos: { x: 30, y: 63, w: 640, h: 72 }    type: subForm    props:      form: step_grid
  keyboard:    pos: { x: 5, y: 423, w: 690, h: 130 }    type: subForm    props:      form: keyboard
bg_image must be declared first — controls are rendered in declaration order,
so the background image sits at the bottom of the stack and everything else is
drawn on top. This also reserves the correct slot for the spectrum visualizer,
which will be inserted between bg_image and the other controls in a later
pass.
Press Apply. The step grid and keyboard appear together on the background, and the instrument is already 80% functional: the sequencer cycles through all 16 steps, the red playhead tracks which step is playing, clicking a step selects it (green LED), and the keyboard shows that step’s current note — which can be changed live while playback is running.
Outline
Section titled “Outline”- Global controls panel (volume, filter, delay, reverb)
- Remaining per-step parameters (filter, filter env, velocity, wavetable position) — second loop