RT Scripting: Triggering the Noise Layers (Pass 2)
The pedal noise built in the previous chapter needs to fire whenever the
sustain pedal’s CC64 value crosses the down/up threshold — and pedal.script
is already watching CC64 for exactly that reason, to drive sustain. Rather
than write a second script duplicating that same event handling, this chapter
extends the existing one. A dedicated second script would keep the two
concerns — sustain and pedal noise — more cleanly separated, but reusing the
script already in place keeps this walkthrough simpler.
Open the Script
Section titled “Open the Script”Double-click pedal.script — the same script built in
RT Scripting: Sustain Pedal — to open it.
Add the Zone Map UID and Key Constants
Section titled “Add the Zone Map UID and Key Constants”Directly after -- END_INFO_BLOCK, with one or two blank lines separating it
from the info block, add:
local pedalZoneMapUid = "<your-copied-pedal-zone-map-UID>"local midiNotePedalDown = 0local midiNotePedalUp = 12Replace <your-copied-pedal-zone-map-UID> with the UID copied from
pedal.zmap at the end of the previous chapter. This UID is unique to your
own project — copy-pasting the placeholder text verbatim will not work; every
project generates its own UIDs.
Placing this block right after the info block, ahead of any logic, is a convention already established in the 303 walkthrough: it groups everything this script depends on from outside itself — zone map UIDs, key numbers — in one place at the top, separate from the behaviour below. It’s a small thing, but it keeps the script somewhat self-documenting and easier to maintain later, since every external reference is visible at a glance instead of buried wherever it happens to be used.
Add the Pedal Noise Playback Function
Section titled “Add the Pedal Noise Playback Function”Just before onProcessEvents, paste the following:
-- save the event id of the currently playing pedal noise; if another pedal-- noise should be played (for instance, if the pedal is pressed down and-- released again immediately), we can terminate the currently playing noise:local pedalNoiseEventId
function playPedalNoise(offset, isDown)
  -- terminate a possibly already playing pedal noise:  if pedalNoiseEventId then    sys_set_note_length(0, pedalNoiseEventId)  end
  local midiNote
  if isDown then    midiNote = midiNotePedalDown  else    midiNote = midiNotePedalUp  end
  pedalNoiseEventId = sys_create_note_event(offset, 0, midiNote, 100, 10.0)  sys_force_note_event_to_zone_map(pedalNoiseEventId, pedalZoneMapUid)end
Tracking the Currently Playing Noise
Section titled “Tracking the Currently Playing Noise”local pedalNoiseEventIdHolds the event id of whichever pedal noise was started most recently, or
nil if none has played yet. A single variable is enough — only one pedal
noise ever needs to be tracked at a time, since a pedal-down noise and a
pedal-up noise can never be playing simultaneously by definition (the pedal
is either down or up).
Cutting Off an Already-Playing Noise
Section titled “Cutting Off an Already-Playing Noise”if pedalNoiseEventId then sys_set_note_length(0, pedalNoiseEventId)endIf the pedal is pressed and released again in quick succession, a previous
pedal noise might still be ringing when a new one needs to start. Setting its
length to 0 terminates it immediately, so two overlapping pedal noises never
stack on top of each other — the newest one always wins.
Picking the Sample by MIDI Key
Section titled “Picking the Sample by MIDI Key”local midiNote
if isDown then midiNote = midiNotePedalDownelse midiNote = midiNotePedalUpendTranslates the isDown boolean the function is called with into the actual
MIDI key that plays the matching sample in pedal.zmap — the same two key
numbers noted down at the end of the previous chapter.
Firing the New Noise Event
Section titled “Firing the New Noise Event”pedalNoiseEventId = sys_create_note_event(offset, 0, midiNote, 100, 10.0)sys_force_note_event_to_zone_map(pedalNoiseEventId, pedalZoneMapUid)sys_create_note_event creates a new note at the given offset, on channel 0,
at midiNote, with velocity 100 and a length of 10 seconds — comfortably
longer than either noise sample, so it always has room to play out in full
before its length would otherwise cut it off. The returned event id is stored
in pedalNoiseEventId, both so the next call can find and terminate it if
needed, and so this call’s own result is available for that same purpose next
time.
sys_force_note_event_to_zone_map then routes that event directly into
pedal.zmap by UID — the same mechanism the 303 walkthrough’s sequencer uses
to route its notes into its own zone map, bypassing the source processor’s
key/velocity triggering entirely. This is exactly why pedal.zmap couldn’t be
wired into the source processor in the previous chapter: it was never meant
to be triggered that way.
Call the Function from the Pedal State Transitions
Section titled “Call the Function from the Pedal State Transitions”onProcessEvents already detects the exact moment the pedal transitions down
or up, to drive sustain. That’s also precisely the moment playPedalNoise
needs to be called — so a single call goes into each of the two existing
branches:
if isDown and not pedalDown then pedalDown = true playPedalNoise(event.offset, true)elseif not isDown and pedalDown then pedalDown = false playPedalNoise(event.offset, false) for id, _ in pairs(heldNotes) do sys_set_note_length(event.offset, id) end heldNotes = {}endBoth calls reuse event.offset — the same offset already driving the
sustain logic — so the pedal noise fires in perfect sync with the pedal
transition that triggered it. playPedalNoise(event.offset, true) fires the
pedal-down noise the moment the pedal goes down; playPedalNoise(event.offset, false) fires the pedal-up noise the moment it comes back up, right alongside
the code that releases every held note.
Verify the Result
Section titled “Verify the Result”After applying the script, pedal noise playback should be operational. Its default volume is quite low by design — quiet enough that it might not be obviously audible at first, which is the intended, subtle effect. To check that it’s actually working, temporarily turn up the Master volume amp built in Pass 1 sound design, then press and release the sustain pedal a few times. Both the pedal-down and pedal-up noises should be clearly audible while turned up, and unobtrusive once the Master volume is set back to normal.
With that, both noise layers are fully working: release noise triggers natively off key-up, and pedal noise now fires correctly off this script. Only now does it make sense to add a way to dial their combined level in and out — doing it any earlier, before the pedal noise actually had a way to play, would have had nothing to actually dial.
Set Up a Realism Zone Variation
Section titled “Set Up a Realism Zone Variation”So far, the release and pedal noise levels are fixed — set once via each zone map’s Gain field, back in Sound Design (Pass 2). The finished instrument should instead let the amount of realism (how audible those small mechanical sounds are) be dialed in, rather than being one permanent compromise.
The mechanism for that is a zone variation: a named collection of zones — potentially pulled from several different zone maps at once — paired with a set of parameter overrides that apply to all of them together. Those overrides can be relative (added on top of whatever value a zone already has) or absolute (replacing it outright); this walkthrough uses absolute overrides, which is also the default.
Create the Zone Variation
Section titled “Create the Zone Variation”Right-click patches -> main -> zone_variations in the file tree and choose
Create new Zone Variation. Name it realism.
Add the Release Zone Map’s Zones
Section titled “Add the Release Zone Map’s Zones”Double-click realism to open it, then select release from the zone map
menu at the top.
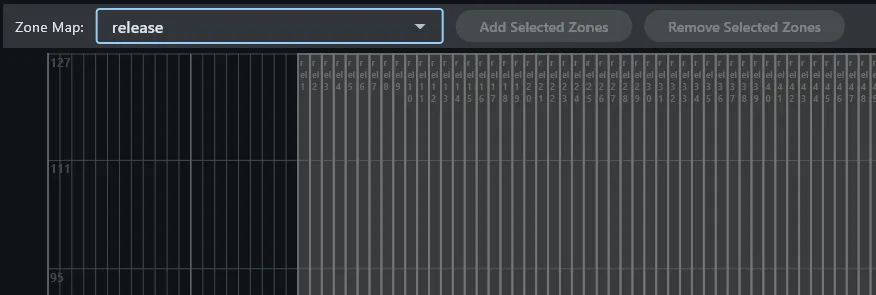
Every zone appears grey at first — grey means a zone is not currently part of this variation. Select all zones, the same way as before, then click Add Selected Zones. The zones turn blue, indicating they’re now included in the variation.
Add the Pedal Zone Map’s Zones
Section titled “Add the Pedal Zone Map’s Zones”Repeat the same steps for pedal.zmap: select it from the top menu, select
all of its zones, and click Add Selected Zones again.
With both zone maps’ zones added, realism now covers every zone involved in
the two noise layers — release and pedal — as a single group that can be
adjusted together.
A real product would probably split this in two. A commercial instrument would likely use two separate zone variations here — one for the release samples, one for the pedal noise — so the end user could dial each in independently. This walkthrough combines both into a single
realismvariation for simplicity; it’s an educational build, not a commercial one.
Add a Realism Control to the Main Layer
Section titled “Add a Realism Control to the Main Layer”Open main.flr again, and select the realism zone variation from the menu
at the top of the layer editor.
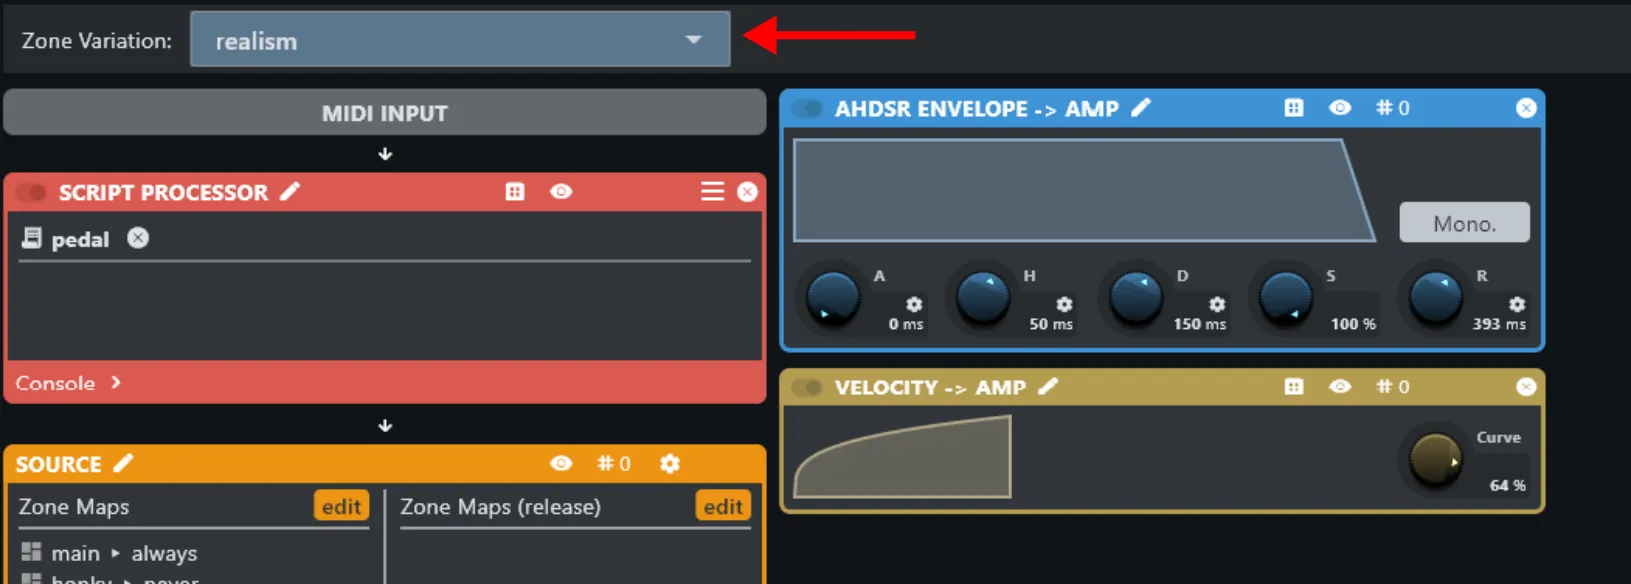
Once selected, every parameter control in the layer starts flashing. This is
the editor’s way of showing that edits are no longer being made to the base
patch — they’re being recorded into the realism variation instead.
With the variation still selected and everything flashing, drag in another Amp processor, right after the source processor. Because a zone variation is active while doing this, a dialog appears asking whether the new processor should be active only within this variation.
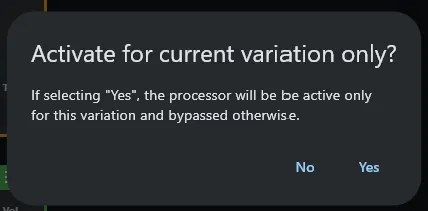
Choose Yes. Under the hood, this simply sets the new amp to bypassed
in the base patch, and not bypassed in the realism variation — the same
bypass property every processor already has, just given two different values
depending on which context is active.
Verify the Bypass Behaviour
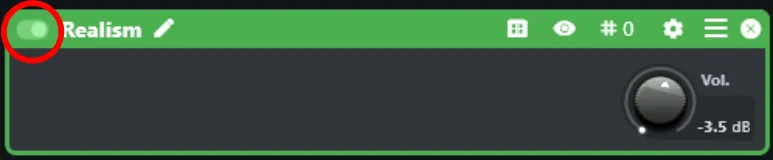
Section titled “Verify the Bypass Behaviour”This is worth checking directly. With the amp in place, deselect the
realism variation from the top menu. The flashing stops, and the new amp
shows itself as bypassed.
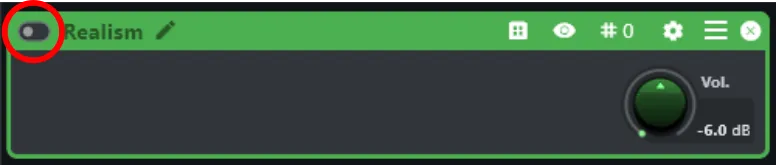
Re-select realism and the amp becomes not bypassed again.
Verify the Routing
Section titled “Verify the Routing”With realism selected and its parameters flashing, turn the new amp’s
Vol. knob. Normal playback volume is unaffected — only the release and
pedal noises change in level. That’s the zone variation mechanism working as
intended: because only the release and pedal zones are members of realism,
a processor that only exists (i.e. is only un-bypassed) inside that variation
only ever ends up affecting sound coming from those zones.
Rename the Realism Amp
Section titled “Rename the Realism Amp”Deselect the realism zone variation again, so edits go back to the base
patch. Then rename the new amp — the same pencil-icon rename used for the
Master amp earlier — to Realism.
Outline
Section titled “Outline”- End of Pass 2: instrument is fully sound-designed and pedal-aware, damper and pedal noise both operational, realism level adjustable as a group
- Exposing the Realism amp’s volume as a user-facing control, in UI: Static Layout