Sound Design (Pass 3): Model Snapshots
With every processor in place — the EQ and honky-tonk zone map from Sound Design (Pass 1), the release/pedal noise from Sound Design (Pass 2) and the realism zone variation from RT Scripting: Triggering the Noise Layers — the last sound design step is turning all of it into the four selectable models described back in the introduction: Standard, Bright, Mellow, and Honky. Each model is built as a snapshot: a captured set of parameter values that can be recalled as a whole.
Understand Snapshots
Section titled “Understand Snapshots”A snapshot is best thought of as a patch-wide preset. It supports two operations: saving, which captures every current parameter value in the patch into the snapshot, and loading, which does the reverse — setting every parameter in the patch back to whatever values the snapshot has stored.
One detail matters for how this chapter is sequenced: a snapshot captures the current parameter values at the moment it’s created, not some neutral or empty state. Creation timing therefore matters. The approach used here is to create all four snapshots at once, up front, while the patch is still in its plain, un-shaped state — then adjust the base patch for each model in turn and explicitly save those adjustments into the matching snapshot.
Create the Four Snapshots
Section titled “Create the Four Snapshots”Right-click patches -> main -> snapshots in the file tree and choose
Create new Snapshot. Repeat this four times, naming the results
standard, bright, mellow, and honky. The names are entirely up to you
— these are simply the ones used throughout this walkthrough.
At this point all four snapshots are identical: each one captured the same, currently unmodified patch state at the moment it was created.
Build the Honky Model
Section titled “Build the Honky Model”Open the main.flr layer editor and click Edit in the source
processor’s left-hand (note-on) zone maps section — the same dialog used back
in Pass 1 to disable honky.zmap. This time, set its trigger condition from
Never back to Always, and click OK.
The effect is audible immediately: the base patch is now playing the honky-tonk zone map layered under the main one, exactly as it did briefly at the end of Pass 1, before it was switched off.
With that change made, double-click the honky snapshot’s file tree node to
select it. Two buttons appear at the top of the snapshot editor: Save
Snapshot and Load Snapshot.
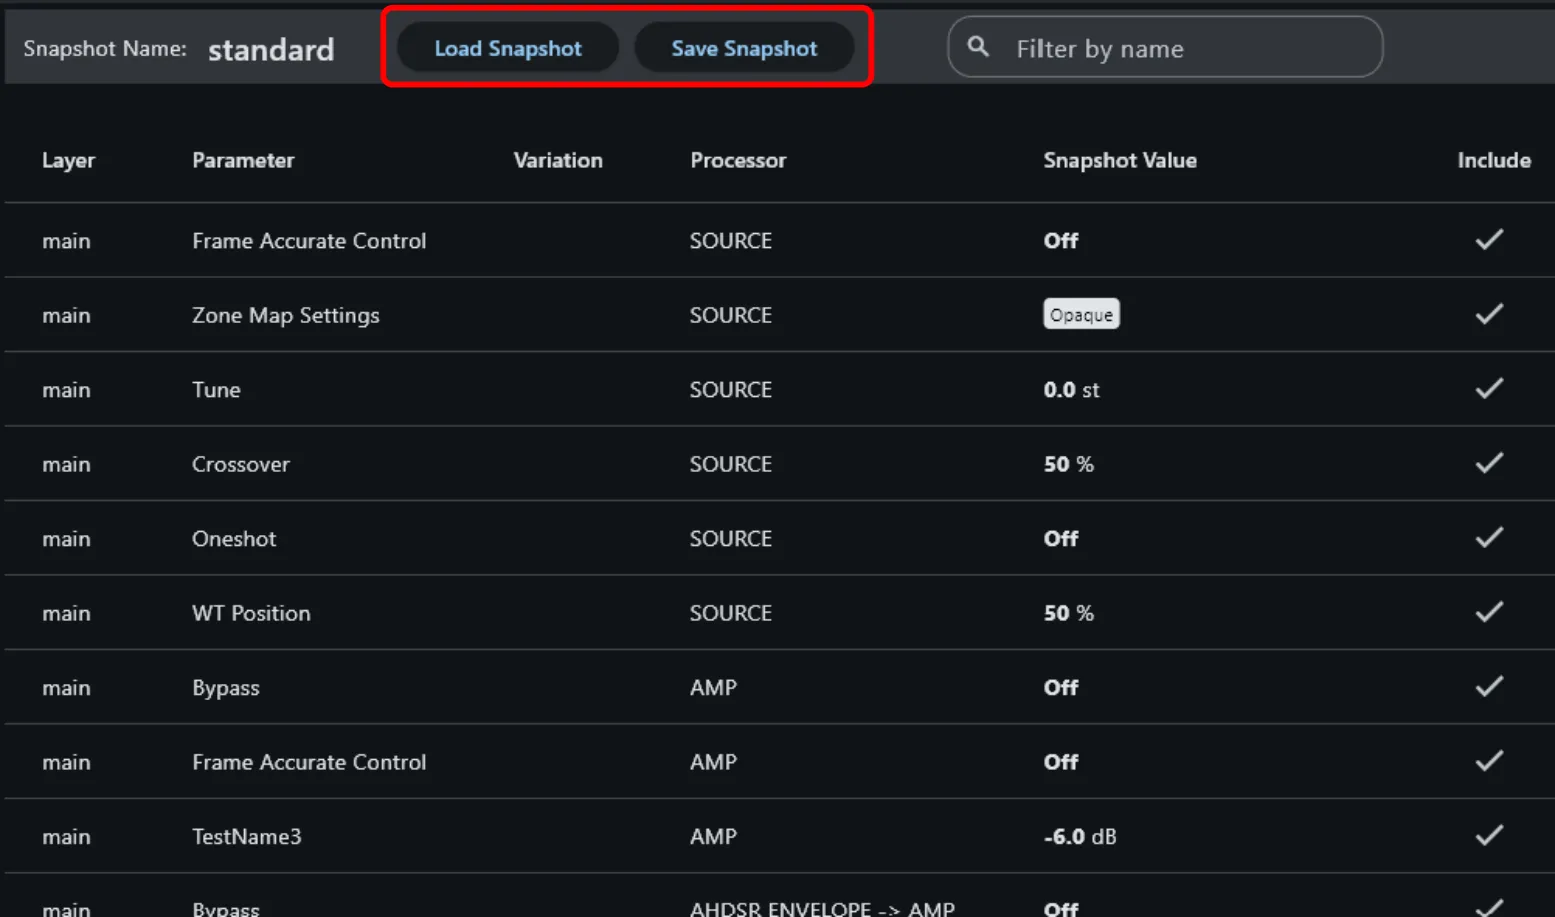
Click Save Snapshot. This captures the base patch’s current parameter
values — including honky.zmap now being enabled — into the honky
snapshot, overwriting what it captured at creation time.
Verify the Result
Section titled “Verify the Result”Switch to the standard snapshot, which hasn’t been touched since creation,
and click Load Snapshot. Playing the piano now, the honky-tonk sound is
gone — standard is recalling the original, pre-honky parameter values.
Switch back to honky and click Load Snapshot again. The honky-tonk
sound returns, confirming the snapshot correctly captured and now correctly
recalls the honky-tonk state.
Build the Bright Model
Section titled “Build the Bright Model”Before changing anything else, re-establish a clean baseline: select the
standard snapshot and click Load Snapshot.
Open the main.flr layer editor and load a preset into the EQ processor —
the same procedure used for the envelope and velocity presets back in Pass 1:
open the EQ’s preset dialog, click Import, and pick the matching preset
file from the asset bundle. This time, select the Bright preset — a curve
that lifts the top end.
Double-click the bright snapshot to select it, then click Save
Snapshot. The Bright EQ curve, along with the rest of the current patch
state, is now captured in the bright snapshot.
Build the Mellow Model
Section titled “Build the Mellow Model”With the Bright curve still applied to the EQ, open its preset dialog again and this time select the Mellow preset — a curve going the other direction.
Double-click the mellow snapshot to select it, then click Save
Snapshot.
Sound Design Complete
Section titled “Sound Design Complete”All four models are now in place and independently recallable: standard
(the plain baseline), bright and mellow (differing only in their EQ
curve), and honky (the detuned zone map layered in). With that, sound design
for this instrument is done. The next phase is building the UI.