Sound Design (Pass 2): Damper & Pedal Noise
With the piano fully playable, this pass adds the small mechanical sounds that sit underneath the notes on a real acoustic piano: the damper falling back onto the string when a key is released, and the felt/mechanism noise of the sustain pedal itself moving up and down. Both are built as their own zone maps, using noise samples already sitting in the project — bundled into the same asset download imported back in Gathering Assets, just left unused until now.
The two aren’t quite the same kind of problem, though. The damper noise is still
tied to ordinary key presses, so the source processor’s standard key/velocity
triggering mechanism handles it correctly on its own — no scripting required.
The pedal noise has no such relationship to a key; it has to fire when the
sustain pedal’s MIDI CC changes, which the source processor has no concept of.
That part is handled by extending pedal.script — the same script already built
in RT Scripting: Sustain Pedal to handle sustain — rather
than by writing a second one. A dedicated, separate script would arguably be the
cleaner design, keeping sustain and pedal-noise concerns apart, but reusing the
existing script keeps things simpler for this walkthrough, and is covered in
RT Scripting: Triggering the Noise Layers. This chapter
builds both zone maps and gets the release noise fully working; the pedal zone
map is built here too, but only wired up to anything once that script is
extended, in the next chapter.
Create the Release Zone Map
Section titled “Create the Release Zone Map”Right-click patches -> main -> zone_maps in the file tree and choose Create
new Zone Map. Name it release.
Activate the Release Zone Map
Section titled “Activate the Release Zone Map”Double-click release.zmap to open it.
Map the Release Samples with AI
Section titled “Map the Release Samples with AI”Open the AI chat panel again, the same way as during the earlier sample mapping.
With release.zmap selected, type the following into the chat input and submit
it:
Now map the release samples for my piano
The same caveat as before applies: results can vary. In most cases the AI
correctly identifies the release samples among everything else in the samples
folder and maps them without any help; occasionally it may ask a follow-up
question first, which is normally enough to arrive at a correct mapping.
Route the Release Zone Map into the Source
Section titled “Route the Release Zone Map into the Source”Switch to the main.flr layer editor. In the source processor, click the
Edit button in the Release column.
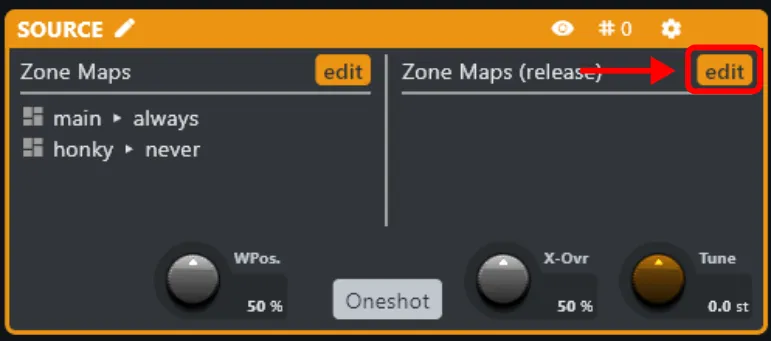
In the dialog that opens, select the release zone map, then click OK to
close it.
Play the instrument. The release samples now trigger correctly whenever a key is released — but at this point they’re much too loud relative to the main voice.
Turn Down the Release Samples
Section titled “Turn Down the Release Samples”Switch to the release zone map and select all zones, the same way as during
normalization back in Pass 1. Open the zone properties side panel, enter -18
dB into the Gain field, and press Enter.
All release samples now play back much softer — closer to the subtle, background-level damper noise a real piano produces, rather than competing with the note itself.
Create the Pedal Zone Map
Section titled “Create the Pedal Zone Map”Right-click patches -> main -> zone_maps in the file tree and choose Create
new Zone Map. Name it pedal.
Double-click pedal.zmap to open it.
Add the Pedal-Down and Pedal-Up Samples
Section titled “Add the Pedal-Down and Pedal-Up Samples”This zone map only needs two zones, so there’s no need to involve the AI this time — dragging the samples in directly is quicker.
In the file tree, expand assets and find the samples folder — the same one
the piano’s sustain samples were imported from. Drag pedalD1.wav (the
pedal-down noise) onto the very left of the zone map.
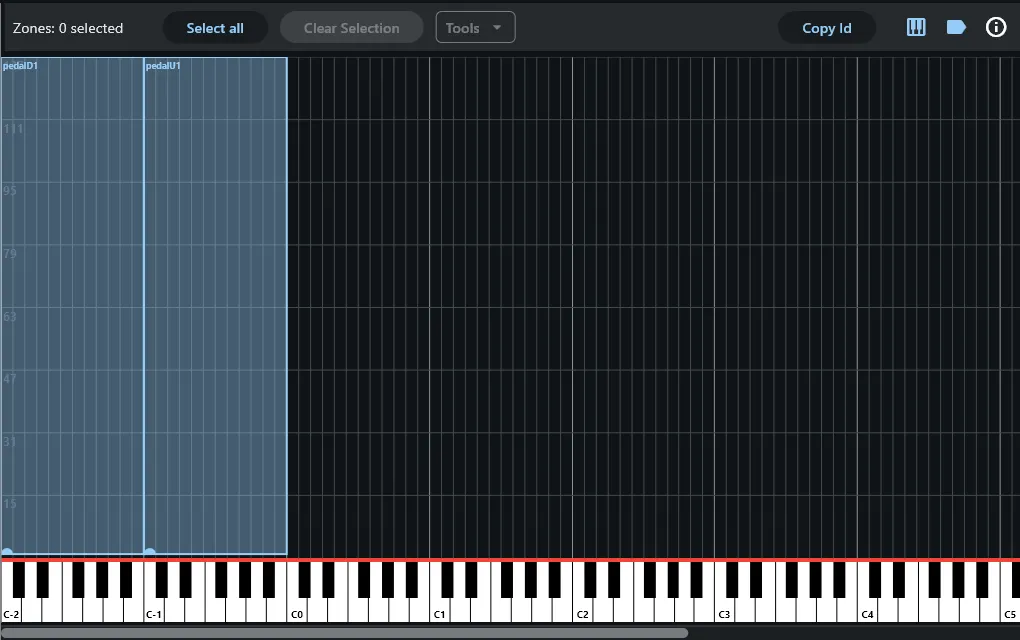
After dropping, the new zone spans the entire key range. A freshly dropped zone is selected by default — selection is what makes a zone’s edges respond to the mouse — so grab its right edge and drag it inward until the zone covers only the first octave, C-2 to B-2.
Drag pedalU1.wav (the pedal-up noise) onto the zone map next, starting at C-1.
It also spans the full available range on drop; shortening it to one octave, the
same as the pedal-down zone, isn’t strictly necessary, but keeps the map easy to
read later — do so for consistency.
Why This Zone Map Bypasses the Source Processor
Section titled “Why This Zone Map Bypasses the Source Processor”Unlike release.zmap, pedal.zmap will not be plugged into the source
processor at all. Everything the source processor triggers is tied to
key/velocity — notes and releases — and the pedal noise has no relationship to
either; it needs to fire when the sustain pedal’s CC64 value crosses the down/up
threshold, a condition only a script can observe.
The mechanism for that is the same one used in the 303 walkthrough: every object in the engine, including a zone map, has a UID it can be addressed by directly from a script, independent of the source processor’s own triggering rules.
Copy the Zone Map UID
Section titled “Copy the Zone Map UID”While still in the pedal.zmap editor, click Copy UID.
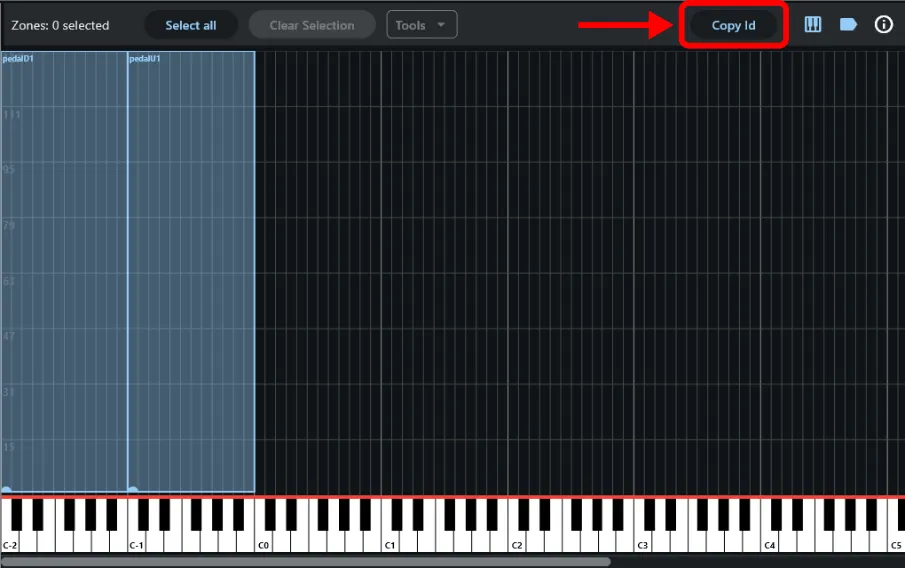
Paste it somewhere safe for now — a text editor, a scratch note, anywhere it’s easy to find again. The next chapter’s script needs it to address this zone map directly.
It’s also worth noting down which MIDI key triggers which sample, since the script will need to pick between them explicitly:
- Key
0(C-2) →pedalD1.wav, the pedal-down noise - Key
12(C-1) →pedalU1.wav, the pedal-up noise
Outline
Section titled “Outline”- Triggering the pedal noise from the sustain-pedal script, in RT Scripting: Triggering the Noise Layers
- Once both noise layers are fully working: a zone variation to dial in their combined “realism” amount